Bluebook Training
Adding Repairs Using the Repair Window
In This Section
 Identifying and Noting Repairs
Possible
Multiple Steps to Complete One Action
Common
Questions Answered
Identifying and Noting Repairs
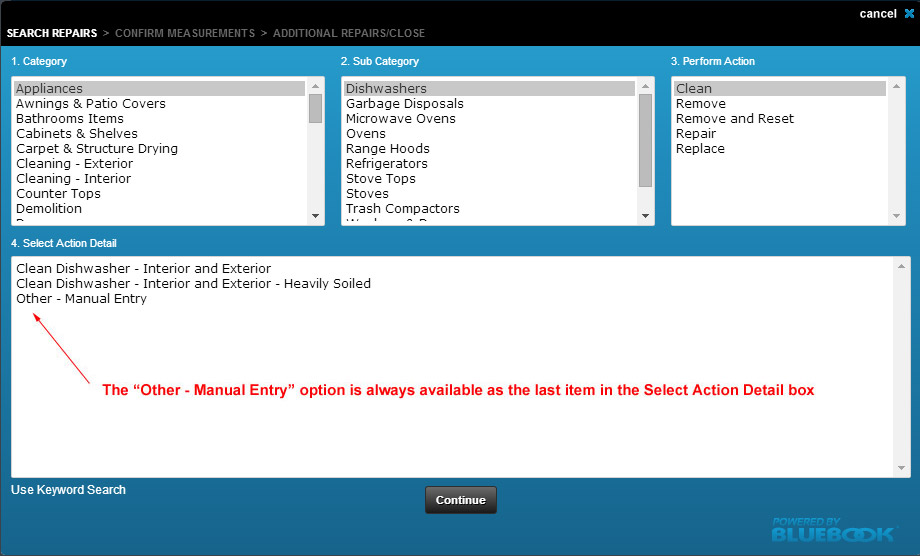
Step One: Search and Identify the repair
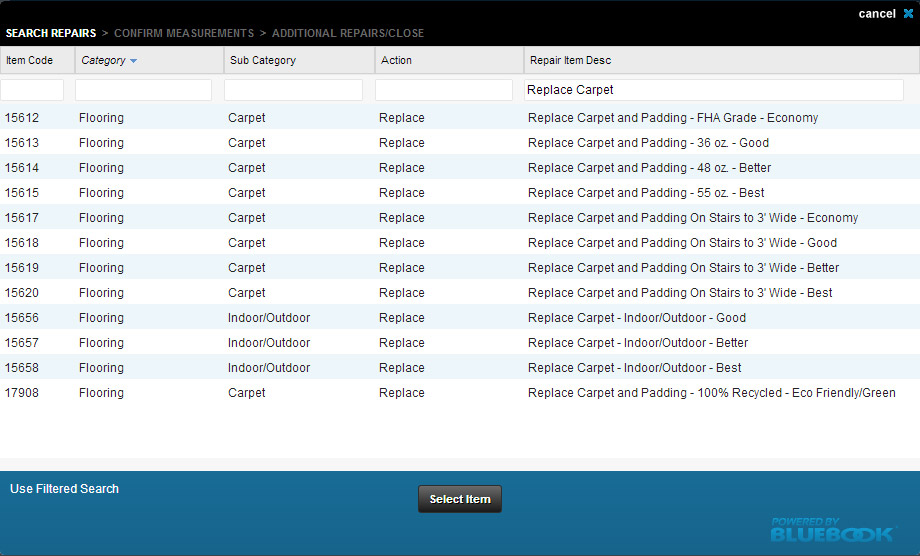
When the repair window opens, you will see four boxes (Category > Sub Category > Perform Action > Select Action Detail) with options. (Depending on your connection this may take a few seconds to load.) The boxes are numbered 1-4 to indicate their order and each box helps filter down to the final selected action detail in Box 4. You can click in any of the boxes to change the filter. If you want to use a keyword search to find a repair, you can switch the search view by clicking the "Use Keyword Search" link in the lower left hand corner (#5 below). We will select "Replace Carpet and Padding - 48 oz. Better" and then click continue.
Hover over the numbers to learn more
Filtered search view (Above) / Keyword search view (Below)
Step Two: Confirm Measurements
Your selection will show at the top of the white panel (#1 below).
Below your selection you will see the items that make up the final price of the
repair (#2 and #3 below). When applicable, this will be
pre filled with the areas estimated measurements. You may overwrite these fields to more
accurately note the repair if needed. Adding your own price to the "Vendor PPU"
will overwrite Bluebook's price, and changing the "% Affected" can be used to indicate
if only part of a component needs repair attention.
If the order allows, you can choose to classify the repair with codes or as a hazard
issue by using the checkboxes or the Safe,
Sound and Secure dropdown (not shown) (#4 below). You may change
your repair selection by clicking on the 'Go Back' button (#5 below)
and then re-doing step 1. When finished click the Save button.
Hover over the numbers to learn more
Step Three: Close or Add another Repair
You will be directed to this screen confirming your repair has been captured. (#1 below) From here, you have the ability to search again and add another repair (#3 below) or, if applicable, to select from associated repairs that the system found based on your selection (#2 below).
Hover over the numbers to learn more
Possible Multiple Steps to Complete One Action
When repairing or performing any other action to an item, it may take more than one step to complete. We want to make special mention to make sure you fully document the repair. For example: If a toilet needs to be replaced, you must first remove the old one, and then you can replace it with a new one. This would be 2 repairs in our process and should be noted as so.
Pro Tip:
For items that are being removed (toilets, appliances, roof material etc...) don't
forget to include the haul away of the item or debris removal. The CVA has a "Hauling
and Debris Removal" category for such items that can be found in the category section
for all reapair items.
Common Questions Answered
What if I can't find the repair I am looking for in the repair window?
If you can't find a repair item in the repair window you can add a manual entry. This can be found in the "Select Action Detail" box on the opening page of the repair window. No matter how you filter, "Other - Manual Entry" will be an option at the bottom of the list.