If you can't find your answer below, our help desk is available at (949) 470-9534
Repair Estimator Quick Help
Repair Estimator How To's
HOW TO: Add a Repair Overview
STEP ONE: Create / Select an Area for Repairs
You are defaulted one area (entire House) when you begin. All estimated measurements given will be for the entire house. If you want to note a repair in an area (example, bedroom) simply add the area by clicking on the "Add Room or Area" link (#1 below) located under the property address.
The area window will open. Simply select the area you want and follow the directions. when finished, the prompt will close and your area will be created.
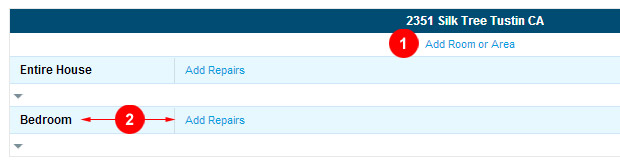
STEP TWO: Click the "Add Repair" Link for that Area to Open the Repair Window
Next to each area created there is a corresponding "Add Repair" link. (#2 above) Clicking on that link will open the repair window and you will follow the repair window process ( For a full walk through click here )
Repeat the process of adding repairs for that area. At any time you may add more areas or add any repairs to any areas by clicking the corresponding link for that area.
HOW TO: Delete an Area
Deleting an Area
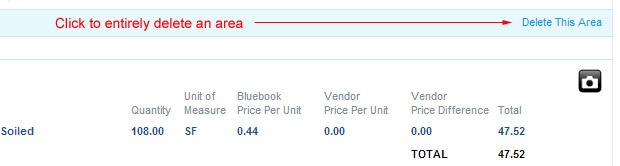
To delete an area, click the corresponding "Delete This Area" link located on the same bar as the area name. Deleting an area will delete all repairs and photos associated for that area.
HOW TO: Delete and Edit a Repair
Deleting a Repair
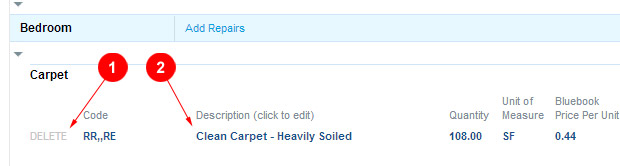
To delete a repair item, simply click the delete link located next to that item (#1 below)
Editing a Repair
To edit a repair item, simply click the line item description (#2 below) and the repair window will open to that item. Make your edit, click save and the item will update automatically.
HOW TO: Add a Photo to a Repair Item
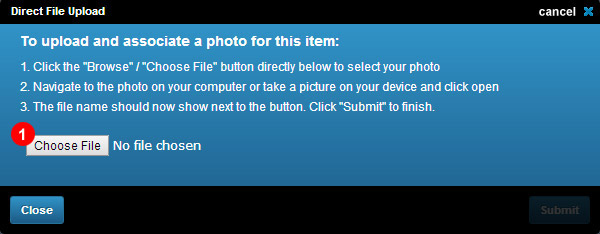
Click on the photo icon 
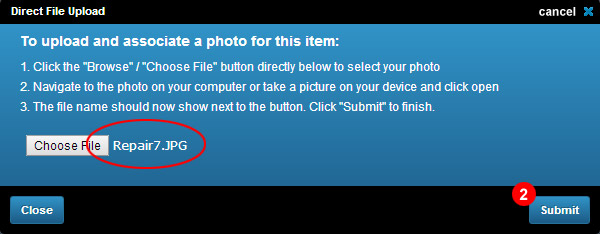
Clicking on the icon will open your computers file upload window. Click on the Choose File button (#1 below) to navigate to where your photos are stored and select the photo(s) that pertain to the line item. Select the photo and click to continue. The photo window will now reflect the name of the file you selected (circled below).
Click submit (#2 below) to close the window. Closing the window will upload and automatically associate the photos with that item. The icon will turn green showing that you have succesfully uploaded and associated a photo.
HOW TO: View Your Repair Report / Generate a PDF
Use the Bottom Navigation to view reports
Located at the bottom of the repair estimate are buttons pertaining to your estimate report.
Preview Estimate Generate PDF Report Close Estimate
Preview Estimate:
This will navigate you to your online report view. This is the html version of your report.
You can print this report, save as a PDF or use the "Email Report Link" to email a link to your current estimate for someone to review.
Generate PDF Report:
This will open a window and generate a PDF. You can save the PDF to your desktop or print for your records.
Close Estimate:
This closes your estimate and saves your progress. You will be directed back to your dashboard (if applicable).
HOW TO: Taking Good Pictures
As important as the photos are, making sure they capture the information needed is equally as important. Below are some tips/guidelines for taking photos:
- Always take more photos than needed, it is easier to not use pictures than to re-take them.
- When taking room pictures get as much of the room in the picture as possible.
- Don't get any homeowners or other people in the photos.
- Make sure all photos are well lit and everything is visible.
- Take multiple photos of repairs and hazards to fully document the problem.
- If you are not sure a photo is required, take a photo just in case.
- Taking photos horizontally (landscape) is preferred but not mandatory.
Repair Estimator Questions
How do I save my estimate's progress?
Your estimate is automatically saved after each action your perform. There is no save button. Exiting your estimate will preserve it exactly as is when you left.
I have more than one photo I want to associate, can I?
Yes you may associate as many photos as you want to fully document a specific line item. Follow the same steps as associating one photo.